Creating a New CL
When a CLS360 instance is created, the first Class Library is usually added at the same time by Datum360, (Class Library names etc are requested prior to creation).
Class Libraries can be added manually (i.e. not seeded from any other Library), and will be empty on creation.
To add a Class Library, navigate to CL4CL, see CL4CL Access, and click on the Actions button within CL4CL.

Select New Class Library from the drop down options.
In the dialogue box that appears, fill in the new Class Library Name, and Class Library Label.

A new Class Library will now be added to CLS360.
When a new Class Library has been created, a new capability will appear in ACL for the class Library, this needs to be added to user profiles that will edit the Class Library
Users who will be able to edit Class Library objects alias data fields e.g. ID and Name, will require the following capabilities added to their profile;
-
CanEditFunctionalAliases
-
CanEditPhysicalAliases
-
CanEditDocumentAliases
-
CanEditAttributeAliases
Seed a CL
Users can also Seed (Copy) an exiting Class Library from the environment they are working within.
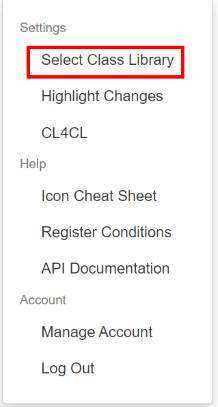
Firstly ensure you are in the Class Library you wish to seed. Click on your username in the top right corner and 'Select Class Library'
Select the Class Library you wish to Seed

Navigate to CL4CL for that Class Library

Under Actions select 'Seed Class Library'

Give your Class Library a name and label (these can be the same)

Select Copy Context and Core Attributes if you wish for it to be the same as the Class Library you are seeding. If you choose not to select this you will be required to configure the context and core attributes against the primary templates (Document, Equipment Item, Equipment Model and Functional), plus some of the application specific ones (Tag Code Mapping, Tag Number Format and Process)
Importing an existing CL from another CLS360 environment
On occasion, there will be times when a new class library will be created that is very similar to a class library that is currently live, the Datum360 standard class library maybe being used as a starting point for example, or a standard class library that is set up for a company.
Instead of having to export a previous class library then reimport it into the new environment, CLS360 can import the class library in one go.
The information required to complete a class library import is as follows:
-
CLS360 URL – this is the URL of the CLS360 environment that holds the class library to be imported.
-
Source Class Library Name – The name of the class library you are importing (there maybe more than one class library in the CLS360 instance).
-
Source Class Library Version – The version of the class library you are importing.
-
New Class Library Name – The name of the class library (this will be the name that appears on first log in to CLS360 when the class library to open will be selected)
-
New Class Library Label – The name seen in the blue band at the top of the CLS360 screen.
To import a class library, go to CL4CL, see CL4CL Access.
Click on the Actions button, located within the bar across the top of the screen, and select Import Class Library from the drop down that appears.
Fill in the fields and click Submit.

When a new Class Library has been created, a new capability will appear in ACL for the class Library, this needs to be added to user profiles that will edit the Class Library
Users who will be able to edit Class Library objects alias data fields e.g. ID and Name, will require the following capabilities added to their profile;
-
CanEditFunctionalAliases
-
CanEditPhysicalAliases
-
CanEditDocumentAliases
-
CanEditAttributeAliases
Renaming an Existing Class Library
To rename a Class Library, in PIM360, select the Class Library that requires the name change.
Navigate to CL4CL, see CL4CL Access, and click on the Actions button within CL4CL.
Select Rename Class Library from the drop down options.
In the dialogue box that appears, fill in the new Class Library Name, and Class Library Label.

Click update and the current Class Library name and label will be updated.
Undo a Class Library
A Class Library can be rolled back (one version at a time).
The Class Library undo (roll back), can not be undone, the changes made in the undo revision are removed forever.
If PIM360 has already been updated to align with the current version of the Class Library, there may be issues when updating PIM360 post roll back, the Datum360 help desk should be contacted. It is not advised to roll back a Class Library to a version that is earlier than the PIM360 snap shot version.
In PIM360 ensure the Class Library to be rolled back is selected.
Navigate to CL4CL, see CL4CL Access, and click on the Actions button within CL4CL.
Select Undo Class Library from the drop down options.
In the dialogue box that appears, type UNDO.

Click the Und button, the Class Library will now roll back 1 version, the Version number in the title bar (next to the Class Library name), will reduce by 1.
Delete a Class Library
A Class Library can be removed completely.
The Class Library deletion is permanent, once deleted the Class Library can not be reinstated.
If the Class Library being deleted is linked to a PIM360 instance, the help desk should be contacted to re-link the PIM360 instance to another Class Library.
In PIM360 ensure the Class Library to be deleted is selected.
Navigate to CL4CL, see CL4CL Access, and click on the Actions button within CL4CL.
Select Delete Class Library from the drop down options.
In the dialogue box that appears, type DELETE.

The Class Library will now be removed.
Bulk Removal of Objects
It is possible to terminate items of a selected object.
The user will require the CanBulkDeleteClass capability assigned to their account.
This function is useful during a Class Library build, where it is possible that objects are accidently loaded into an incorrect object type, e.g. loading Equipment Item Classes into Functional Classes.
Once a PIM360 instance has been linked to a CLS360 Class Library, (by loading a snapshot), the bulk removal of an object type function should not be used , as data loaded into PIM360 may use the objects that are being deleted, and will make PIM360 behave unexpectedly.
To bulk remove objects, in CLS360, click on the Actions Menu, and select Terminate from the drop down that appears.

A dialogue box will appear, in the Terminate Type drop down, select the object you would like to remove from CLS360.

Upload the tab delimited or excel file detailind the name of the objects to be removed. This file only requires one column; 'Name' and should contain the full list of classes, attributes or other objects you wish to remove.
In the Please enter: TERMINATE field, type TERMINATE.
Click Submit and the object type selected will be removed.