LiveView Overview
LiveView allows the generation of queries and searches to create ad-hoc views of the data stored in PIM360.
When launching LiveView – or when changing the type of item to view, the default display returns results showing the Core Attributes (configured via the Class Library) for the particular Object Group being searched.
Creating a New View
There are 2 options for creating views
- Edit an existing standard register or saved view. Be aware that anything new added to a register view will not be automatically recorded. To keep changes to a register view you will need to save the updated view.
- Start a new view from scratch. Click the New
 action button at the top of the screen before starting to clear the view from any previous register or view.
Selecting Attributes
To create your own views:
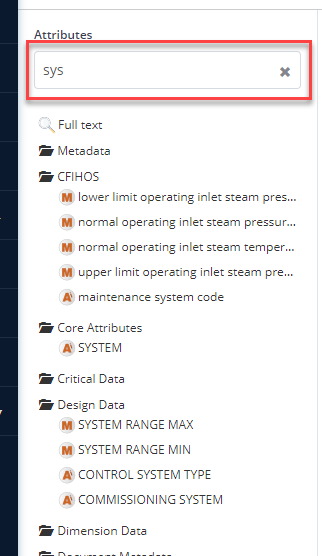
- Go to the Available Attributes pane.
- You will now see folders which group the attributes.
- Click on the black folder that contains the attribute you are interested in.
- Click on the attribute and drag it into the results pane.
- You can also use the quick search at the top of the left hand side pane, by typing in the first few letters of the desired attribute and pressing return, the matching attributes will be shown below.
- Once all attributes have been selected click the run button

- The results will be returned in the results pane
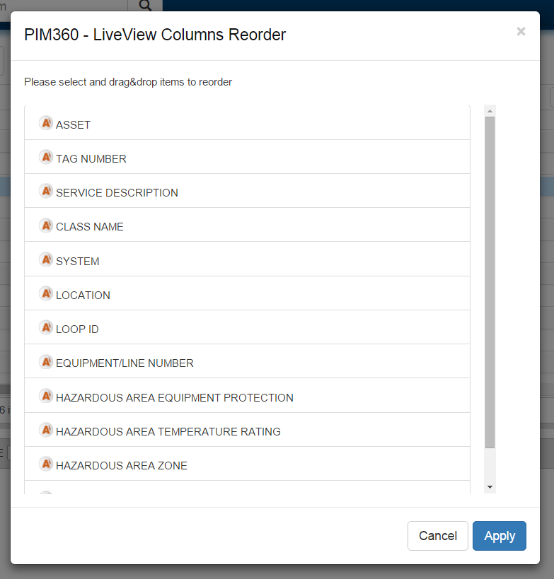
If the columns are not in the desired order, simply drag and drop them into the desired location. Alternatively, you can use the “Reorder Columns” action button to drag and drop columns into the desired order.
LiveView Metadata includes the attribute Lifecycle status. This will show whether the tag/item/model/doc is Active (Live) or Pending (uploaded but not published).
Adding Conditions
It may be desirable to apply a condition to the returned data, i.e. just give me valves on the Platform in system 13.
To do this, you have two options:
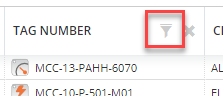
- If the attribute is already in the results, you can click the “Filter” button next to the attribute name, and it will then be added to the conditions area.
- The alternative option is to select the attribute from the left hand pane, either by using the quick search for the attribute in the Available Attributes pane, or by scrolling through all of the attribute groupings.
Once the desired attribute is identified, drag and drop it into the lower conditions pane.
Select the condition type from drop down, is, is not, blank etc.
Condition types include a “matches regex” option which allows users to use regular expressions when defining criteria.
Where applicable enter the criteria.
You have the option to make the condition Case Sensitive.
If the attribute has a list of values you can click the Orange list symbol.  You can then select a value from the allowable list.
Click run.

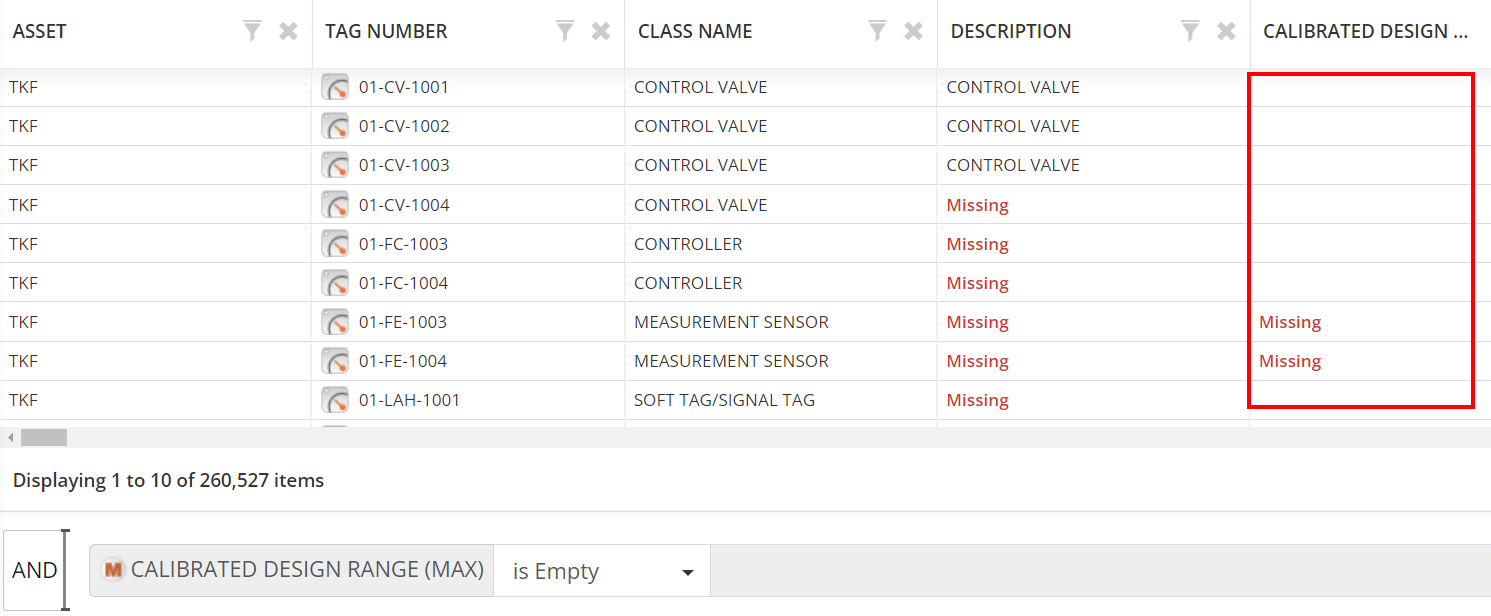
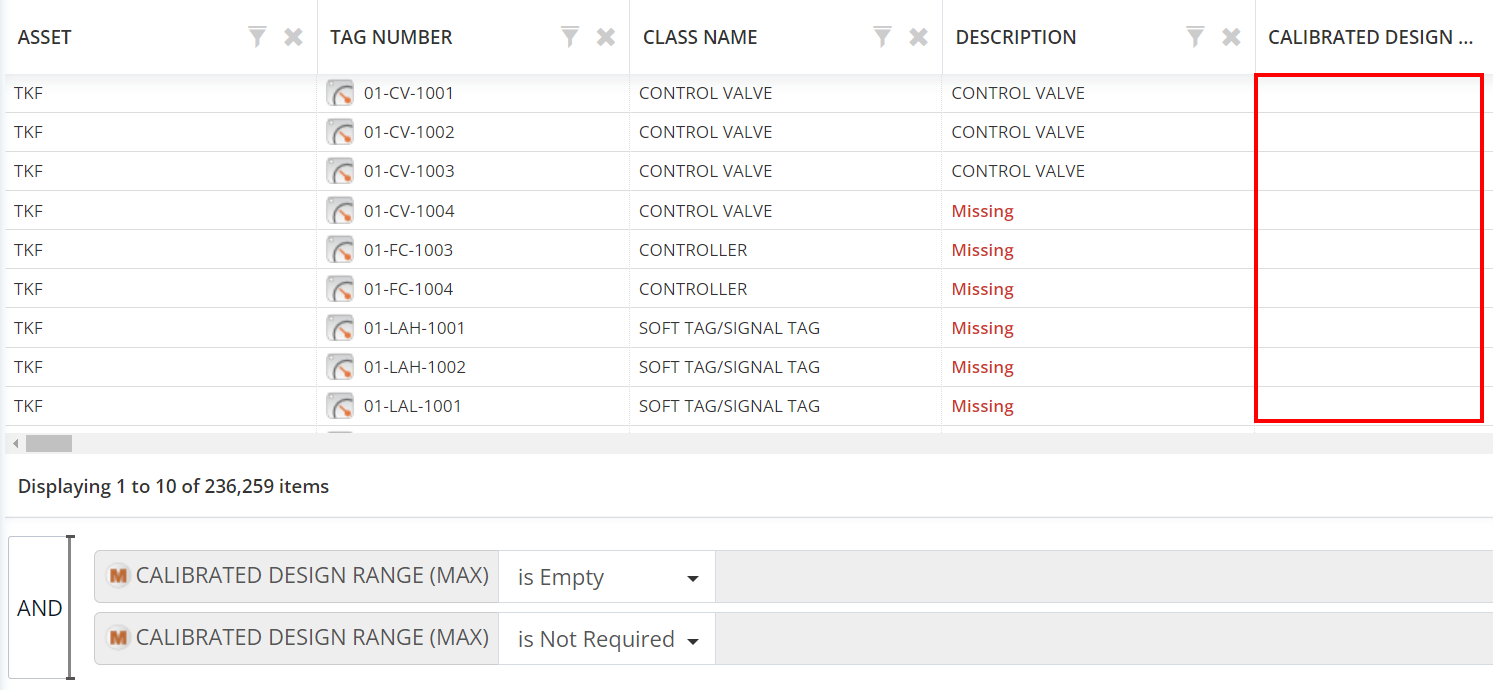
Empty and Missing Conditions.
- If a field shows “Missing”, then the value was expected for this item (tag / document etc.), but has not been provided.
- If a field is blank, then this value is not expected for this item.
- The value ‘Missing’ is displayed in Liveview where an attribute is required for the tag’s Class (as configured by the Class Library in CLS360) and is blank. To filter by ‘Missing’ add the filters ‘Empty’ and ‘Is Required’.

- Adding a filter for ‘Empty’ on it’s own will bring back results for both blank and missing fields.
- To display only blank fields, add the filters ‘Empty’ and ‘Is Not Required’.
Viewing the Results
The results presented are the most up to date available in PIM360 at the time the run button is pressed.
The results can be sorted by clicking on the centre of the LiveView column headings. An arrow will point up or down depending on the sort order. Be aware, you cannot sort on Object URL metadata
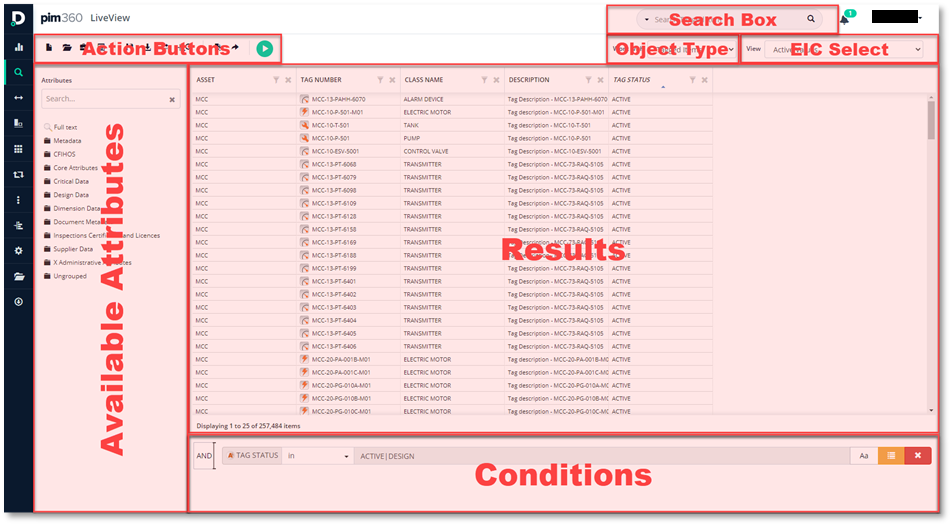
Object Type Selection
There is a drop down called Work With, next to the Action Buttons, that holds the different types of items held in PIM360.
Tagged Items, Equipment Items, Equipment Model and Documents can be selected.
The default option is Tagged Items.
Once selected the LiveView search results pane will refresh with the items chosen and the core attributes displayed.
EIC On/Off Toggle
There is a dropdown at the top of the page for switching the EIC View on and off. When you have EIC switched on, you will see pending values/objects and not live data.
Lookup Normal Attributes
The Action button "Lookup Normal Attributes" adds columns for attributes that are required for all item classes within the current LiveView results pane.
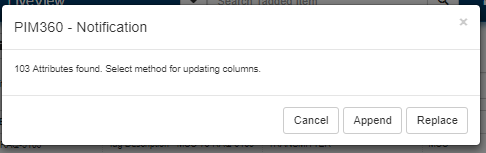
One of three choices is available:
- Cancel – No attributes will be added
- Append – The ‘Normal’ attributes for the classes that are present in the LiveView results pane will be added to the attributes already displayed in the LiveView results pane.
- Replace – The ‘Normal’ attributes for the classes that are present in the LiveView results pane will be the only ones displayed.
Attributes will be added in Alphabetical order.
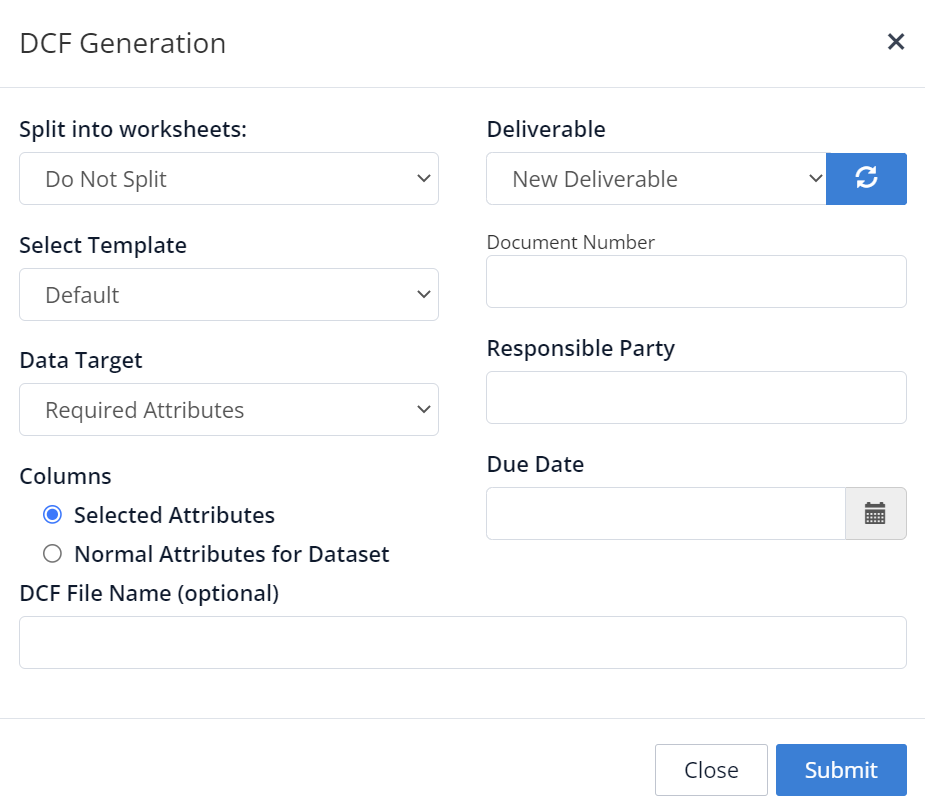
Generate DCF
The action button “Generate DCF” (Data Collection File) creates an Excel file for a given EIC, which contains lookup values for attributes (where applicable). The DCF is added to the EIC as a new or an existing deliverable and is intended for distributing to the parties responsible for adding/updating information as part of an EIC. This functionality will generally only be used by Administrators.
Export Results
To export the results as either an Excel file or a tab delimited file, click the Export button.  This in turn will open a “LiveView Export” dialogue box with a number of options, including being able to specify the file name. If the current view already has a user defined name, then this will show as the default name for the Export file, but it can be changed prior to submitting.
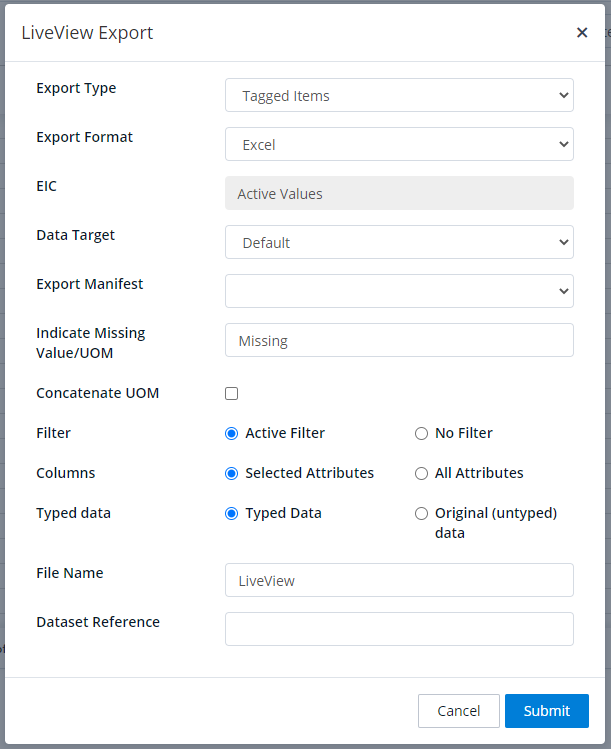
When exporting using the Delimited Export Format option the user can enter the type of delimiter that is required.
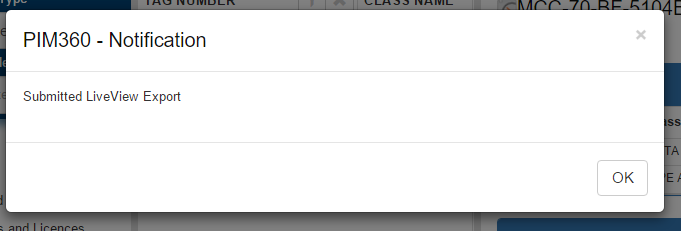
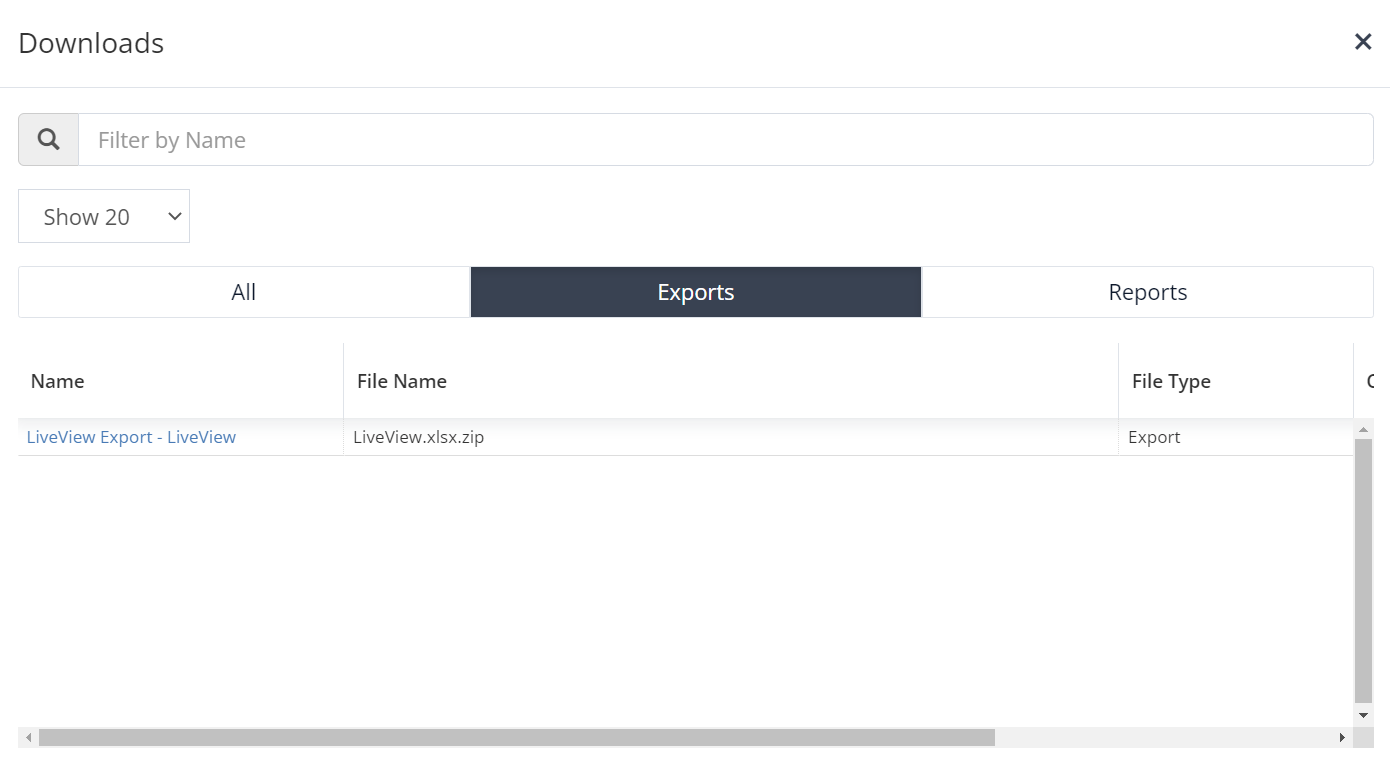
This action will then run and the file will be available for download from the Downloads section  within the left hand side navigation menu.
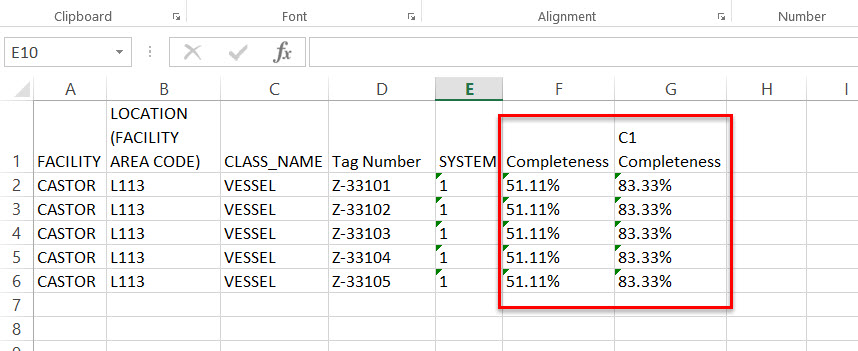
Export options include the ability to incorporate metadata, e.g. Completeness metrics.
 Export Form
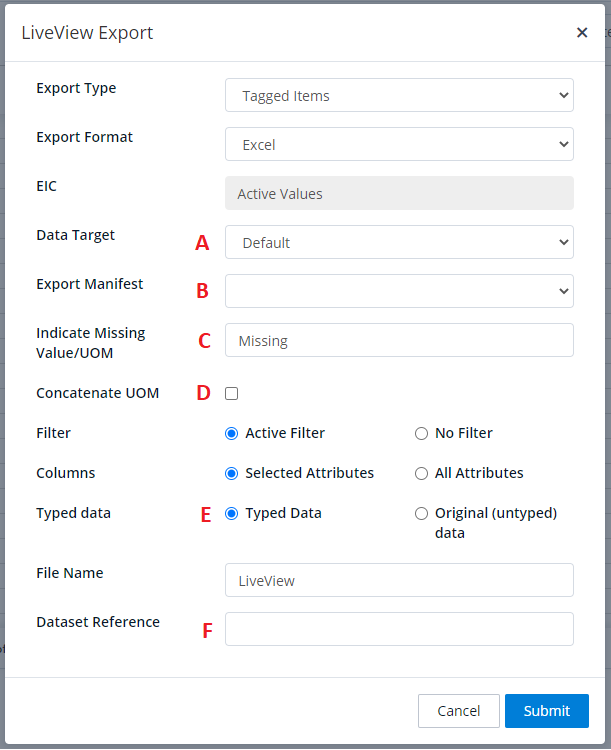
A. Data Target can be selected that uses Output Mappings configured via the Class Library, thus re-labelling the column headings in the output file to match the configured mappings.
B. An export manifest can be created to enable regular exports to be automatically emailed to recipients. Please contact your Datum360 representative to arrange for this to be created.
C. Select what text is used to indicate where a value has not been completed for a required attribute. The default is ‘Missing’ as used within PIM360 views but this can be removed to leave it blank or another value can be used instead.
D. Measure attributes can be displayed in the export as either a single column or separate value & UOM columns.
E. Values can either be exported as Typed Data only, where the value conforms with the Data Type of the attributes, or Original, which will export the non-conforming values that are hidden as default.
F. Users with the appropriate permissions can see this option to set a Dataset Reference. This is an identifier that is added to an export, allowing the export to be referred to by other applications. The Dataset Reference will be pointed to the most recent export of that dataset. Using the Dataset Reference will not create a new export, however it can be used in conjunction with a scheduled export to stay aligned with the live data values. (An example of this is Microsoft’s PowerBi using the Dataset Reference, rather than a one-off LiveView export, as a data source.)
Reports
There are a series of standard reports available, to access them click the Report action button. 
The following reports are available (where relevant permissions have been granted):
-
Source Conflict report – which shows the differences in data between two different sources in one EIC.
-
EIC Impact Report – which shows the impact the chosen EIC will have on the data that is currently live in PIM360.
-
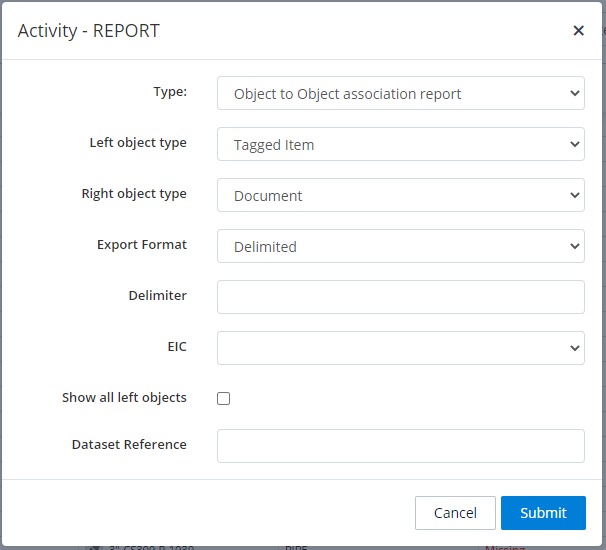
Object to Object report- which shows the relationships between the two chosen objects, i.e. tag to document references could be generated here.
-
Parent Tag inconsistency report – This report provides a list of all values listed in the Parent tag attribute that do not exist in PIM360 in their own right.
Save New View
If you would like to save a view you have created, firstly give it the desired name by clicking on the Save View action button. 
If the view should be available to everyone who has access to PIM360 check the Public View check box.
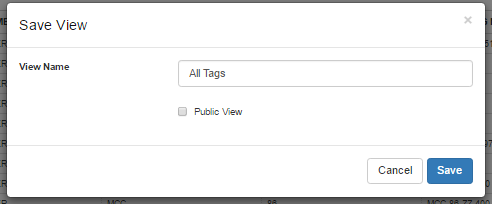
Next click the save button.
To access previously created views, click on the Load Saved View button, and the Load View Dialogue box will appear.
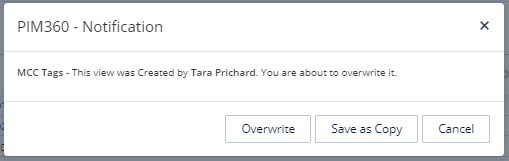
Overwrite View
If a view has previously been saved, and modifications to the view have occurred, the old view can be replaced with the new view.
Click on the Save View action button.
A dialogue box will appear, with the current name of the view already populated, click Save
A PIM360 – Notification dialogue box will appear, giving three options on how to proceed:
- Overwrite
- Save as a Copy
- Cancel
Select the appropriate option to continue.
If the original view is a Public view, users with the capability CanEditPublicView will be presented with the options shown below in Share a View, if the user does not have this capability then the view will be saved as a personal view i.e. the public view will not be amended.
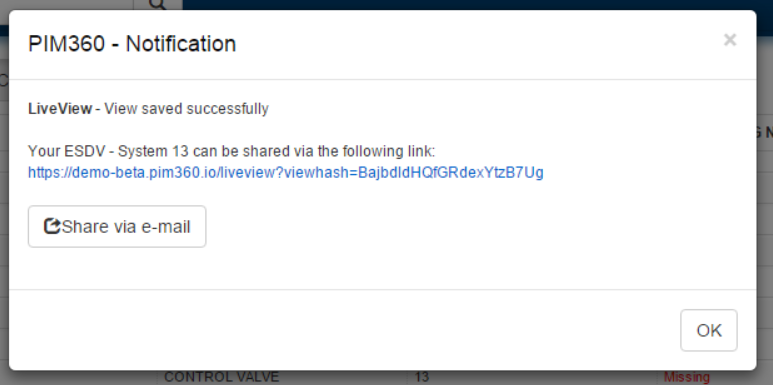
Share a View
It is possible to share a view you have created with another user.
When saving the view following the steps in Save New View the below screen appears where the link can be copied or ‘Share via e-mail’ clicked to open a new email message with the link already included.